
 Save
Save
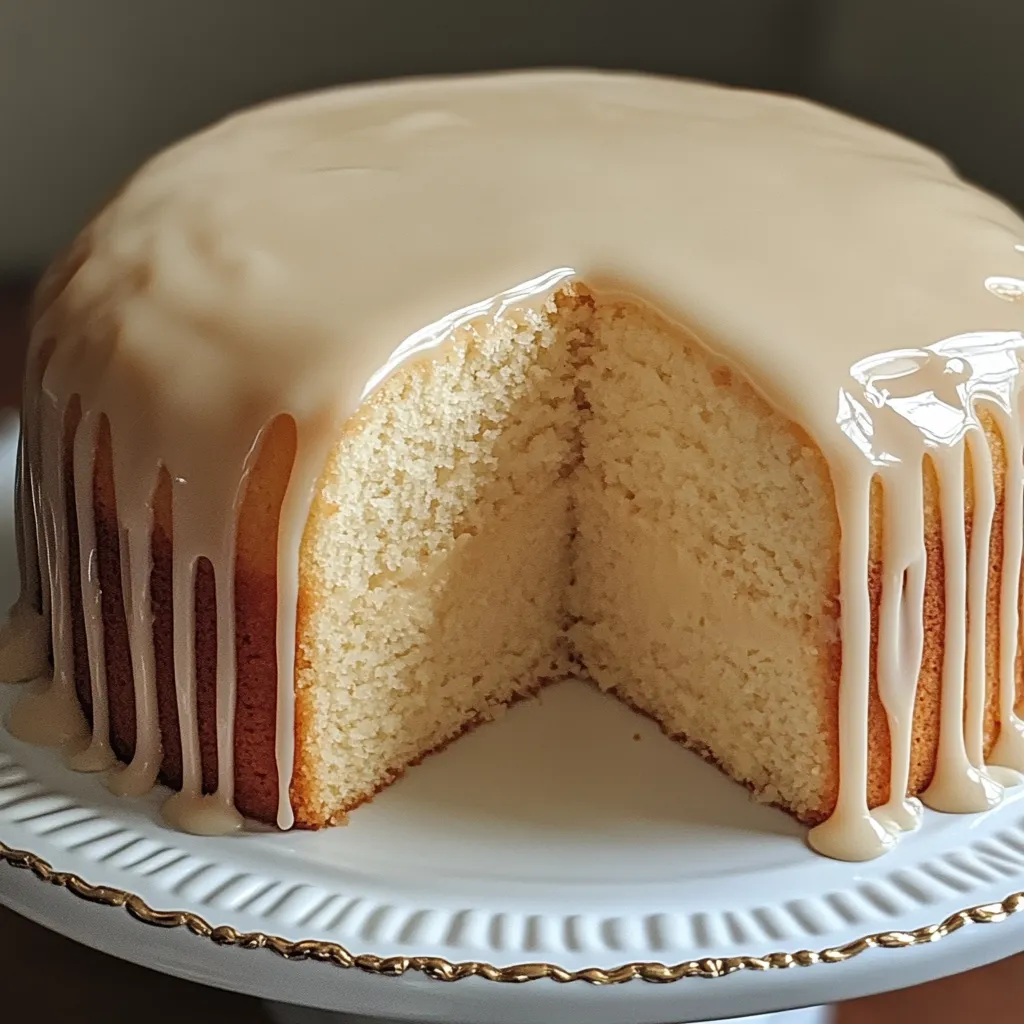
Vanilla Buttermilk Pound Cake topped with Cream Cheese Glaze turns basic kitchen staples into a fancy, smooth treat that perfectly balances sweet and tangy flavors. The buttermilk does wonders in the mix, making an incredibly soft texture with a slight tang that goes great with the rich vanilla flavor in every bite. The cake comes out with a golden, slightly crisp outside that gives way to a juicy, buttery inside that just melts away when you eat it. Topped with a smooth cream cheese glaze that slowly runs down the sides, making it look amazing while adding a tangy kick to balance the cake's sweetness, this classic dessert turns any regular get-together into something special with its straightforward elegance.
I came up with this recipe while trying to find a pound cake that wouldn't dry out after just one day. After trying lots of different wet ingredients, buttermilk came out on top, changing a decent pound cake into something really special. The first time I made this for my family, my grandma—who's super picky about baking—wanted the recipe, saying it was better than the traditional one she'd been making for years. That told me I'd nailed the formula, and I haven't changed it since, serving it at everything from casual coffee chats to big holiday parties.
Ideal Ingredients
- All-purpose flour (3 cups): Makes a solid base while keeping things tender
- Baking powder (1 teaspoon): Gives just enough lift without losing that dense texture
- Salt (½ teaspoon): Boosts all the flavors and cuts through sweetness
- Unsalted butter (1 cup, softened): Brings rich taste and that classic pound cake feel
- Granulated sugar (2 cups): Sweetens while helping get that nice, fine texture
- Large eggs (4, room temperature): Give structure, richness, and nice color
- Vanilla extract (2 teaspoons): Fills the cake with warm, fragrant sweetness
- Buttermilk (1 cup, room temperature): Makes sure the cake stays super moist with a tender bite
- Cream cheese (4 oz, softened): Creates the base for a tangy topping that works with the sweet cake
- Powdered sugar (1 cup): Makes a smooth, sweet glaze with no grainy texture
- Milk or heavy cream (2-3 tablespoons): Thins the glaze to just the right thickness
Cake Creation
Smart Setup
Start by getting your bundt pan ready, since this will decide how nicely your cake comes out. Coat every nook with soft butter, especially around the middle tube and any fancy patterns. Sprinkle flour over the buttered surface, shaking out the extra. This key step makes sure your cake will come out in one piece, keeping its pretty shape. At the same time, let your cold stuff—butter, eggs, and buttermilk—sit out until they reach room temp. This small detail makes a huge difference in how your cake turns out, since room temp ingredients mix up better and trap more air than cold ones do.
Whipping Butter
With your electric mixer, beat the soft butter and sugar at medium speed for a full 5 minutes, until it looks much lighter in both shade and feel. This long mixing time isn't just a suggestion—it's a must for getting air bubbles that create the cake's fine texture. The butter-sugar mix should change from dense and yellow to fluffy and almost white. This process, called creaming, sets up how your cake will feel when you eat it. Taking your time here means you'll get a lighter, softer cake instead of a heavy, dense one.
Adding Eggs
Put in eggs one at a time, mixing well after each one until it's completely blended before adding another. This way keeps the batter from breaking and makes sure each egg mixes in properly. After all eggs are in, mix in the vanilla until the batter looks smooth and even. The batter might look a bit curdled now—that's totally normal and will fix itself when you add the dry stuff. The eggs give structure, richness, and a nice golden color to your finished cake.
Mix and Match
In another bowl, stir together flour, baking powder, and salt until mixed evenly. Add these dry things to your batter in three batches, switching with two pours of buttermilk, starting and ending with flour. Mix on low just until each addition disappears, and scrape the bowl sides between additions. This back-and-forth method stops the gluten from getting too worked up, which would make the cake tough instead of tender. Your final batter should be smooth and thick, with a silky feel that drops slowly off the beater.
Slow Baking
Pour your batter into the ready bundt pan, smoothing the top with a spatula so it's even. Put it in a preheated 325°F oven and bake for about 60-65 minutes. The lower heat lets the cake cook slowly and evenly, so the outside doesn't get too dark before the inside is done. The cake is ready when a wooden pick stuck in the middle comes out clean or with just a few moist crumbs, and the top bounces back when you lightly touch it. Don't open the oven during the first 45 minutes of baking, as temperature changes can make the cake sink in the middle.
Cool Down Time
Let your finished cake cool in the pan for exactly 10 minutes—this timing really matters. If you take it out too early, it might break; if you wait too long, it might stick. After 10 minutes, flip the cake onto a wire rack and gently take off the pan. Let the cake cool all the way to room temp before adding glaze, which takes about 2 hours. This cooling time lets the cake set up and flavors blend together. Though you might want to glaze it while it's warm, that would just make the glaze melt and soak in rather than making those pretty drips down the sides.
Finishing Touch
While the cake cools, make the cream cheese glaze by beating soft cream cheese until it's totally smooth. Slowly add powdered sugar and vanilla, mixing until they're fully blended. Add milk or cream one spoonful at a time until the glaze is pourable but still thick enough to stick to the cake without running off. When the cake is totally cool, put it on a serving plate and drizzle the glaze over the top, letting it naturally flow down the sides. For a fancier look, use a spoon to guide the glaze into the cake's natural grooves.
My grandma always said a real pound cake should be sturdy enough to have "substance" but tender enough to dissolve in your mouth. She taught me that good ingredients and careful technique matter more than fancy add-ins. This recipe honors her knowledge while adding the modern twist of buttermilk for extra moisture and flavor depth. Whenever I cut into this cake, I remember her kitchen—how she'd check if it was done by listening to the cake ("It shouldn't make noise," she'd tell me) and how she never rushed the cooling process. These tiny but important details change a simple cake into something truly special.
Ways To Serve
Dish up slices of this fancy pound cake on little dessert plates with forks for a classy look. For a laid-back brunch, set it out with fresh berries and whipped cream for folks to add as they like. In summer, pair it with a scoop of vanilla ice cream or lemon sorbet that melts a bit into the cake. For holiday gatherings, sprinkle the glazed cake with a touch of cinnamon or freshly grated nutmeg. This versatile cake goes great with coffee or tea, making it perfect for afternoon get-togethers or as a sophisticated way to end dinner.
Fun Twists
Switch up this classic pound cake by trying different flavors and mix-ins. For a citrus version, mix in zest from two lemons or oranges to the batter and swap some vanilla extract with fresh juice in both cake and glaze. Make a marble effect by taking out one cup of batter, mixing in three spoonfuls of cocoa powder, and swirling it through the vanilla batter before baking. For a holiday twist, add ½ teaspoon of almond extract to the batter and top the glazed cake with toasted sliced almonds and candied cherries. During autumn, throw in warm spices like cinnamon, nutmeg, and cloves for a spiced cake version.
Keeping It Fresh
This cake stays moist really well when kept at room temp in an airtight container for up to three days. To keep it longer, stick it in the fridge for up to a week, but let slices warm up to room temp before eating for the best taste and feel. For even longer storage, freeze the cake without glaze, wrapped tight in plastic wrap and then foil for up to three months. Thaw overnight in the fridge while still wrapped, then bring to room temp and add fresh glaze before serving. You can also freeze single slices and thaw them for portion control and enjoying it over a longer time.
I've made tons of different pound cakes over the years, but this buttermilk version remains my go-to recipe because it perfectly balances simple and fancy. There's something really satisfying about a dessert that doesn't need flashy tricks to impress—just good ingredients treated with care and attention. What makes this cake truly special is how it brings people together, creating moments where everyone can enjoy something delicious, whether at a big holiday party or a quiet afternoon coffee. It reminds us that sometimes the most memorable food experiences come from getting the classics just right instead of chasing after the newest trend.
Common Questions About This Recipe
- → If I don’t have a bundt pan, what can I use?
- No worries! Use two 9x5 loaf pans instead. Just shorten the bake time to about 45-55 minutes and test with a toothpick for doneness.
- → When is my cake fully baked?
- It’s ready when a toothpick poked in the middle comes out mostly clean or with tiny crumbs. Look for golden brown edges too.
- → Why does the top of my cake split?
- Totally normal! Pound cakes naturally crack because the surface sets before the inside cooks. It’s part of their charm.
- → Can I swap or add flavors to the cake?
- Definitely! Try stirring in citrus zest, almond extract, or fresh fruits. Spice it up with cinnamon, nutmeg, or cloves if you’d like.
- → Why is buttermilk a key ingredient?
- The tangy buttermilk softens the cake and gives it a fluffier texture by breaking down gluten. It’s the secret to its tender, moist crumb.