
 Save
Save
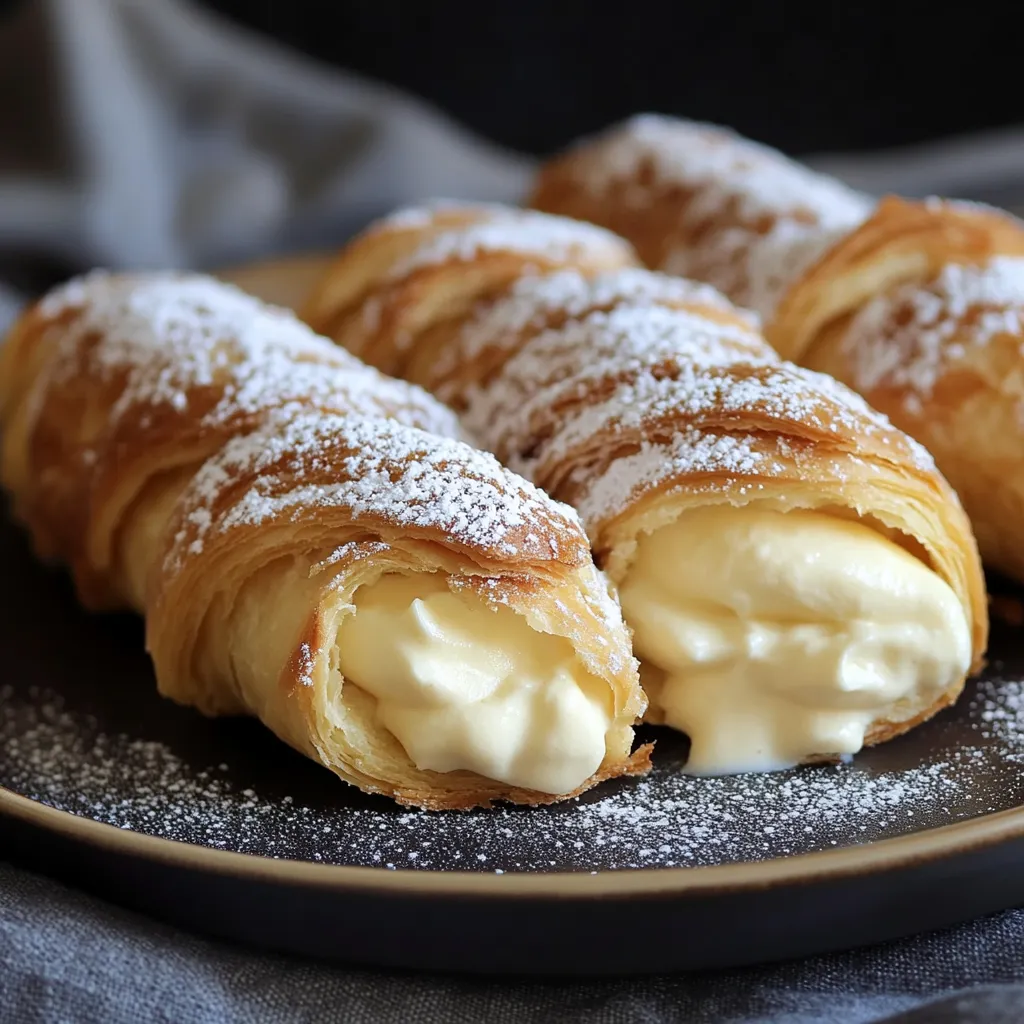
Flaky puff pastry horns packed with silky custard create an authentic taste of Italy right at home. These cannoncini blend buttery, layered exteriors with smooth, rich filling for a stunning contrast in every bite. When you crack through that golden shell to reach the velvety cream inside, you'll understand why these treats have become such beloved classics in Italian pastry shops around the world.
I first tried these cream-filled delights at a tiny shop tucked away in Florence. When I got back home, I couldn't stop thinking about them. It took me several tries, but this version finally nails that genuine flavor that takes me straight back to Italy. Now my family asks for them whenever we're celebrating something special.
Key Ingredients Breakdown
- Egg Yolks: These add richness and smoothness to your custard. Let them sit out until they reach room temp for better mixing. They contain natural emulsifiers that help create that silky texture everyone loves.
- All-Purpose Flour: You only need a bit to get the perfect thickness. Make sure to sift it first so your cream stays completely smooth. When heated, the starch in flour expands and thickens your custard beautifully.
- Sugar: It does more than just add sweetness—it helps your custard stay stable and brings out vanilla notes. Finer sugar works best as it melts quickly and won't leave your custard grainy.
- Vanilla Extract: This forms the flavor base of your filling. Skip the fake stuff and go for real extract—look for the kind with tiny bean specks for the deepest taste.
- Whole Milk: This creates your custard's base. Don't swap in low-fat versions—you need the fat for proper richness. Heat it slowly and watch it carefully.
- Puff Pastry: The shell that holds everything together. Butter-based options give the best flavor. Those hundreds of tiny layers puff up to create that light, crispy texture.
- Egg Wash: This gives your pastries that gorgeous golden look. Just beat a whole egg with a spoon of water and you're good to go.
- Powdered Sugar: The finishing touch that adds sweetness and makes everything look pretty. It melts slightly on warm pastry for a perfect finish.
Making Perfect Horn Pastries
- Custard Making:
- Warm the milk in a pot but don't let it boil. In another bowl, mix egg yolks, sugar, vanilla, and flour until smooth and a bit lighter in color. This adds air for a lighter texture. Slowly pour the warm milk into the egg mix while stirring non-stop. This gently warms the eggs without cooking them. Pour everything back into the pot and cook on medium, always stirring, until it thickens enough to coat a spoon. When you can draw a line through the coating with your finger and it stays, you're done. Put it in a bowl, push plastic wrap right onto the surface, and chill at least an hour.
- Shaping the Shells:
- Heat your oven to 400°F (200°C). Cover your counter with sugar instead of flour—this will caramelize and make your shells extra tasty. Roll your puff pastry into a rectangle about 9×12 inches, pressing it into the sugar. Cut it into twelve 1-inch strips. Starting at one end, wrap each strip around a metal horn mold, with the sugary side facing out. Put them on a paper-lined baking sheet with space between them.
- Oven Time:
- Mix a whole egg with a spoon of water. Brush this all over each pastry horn, but don't let it puddle anywhere. This helps them turn golden and shiny. Bake for 15-20 minutes until they're deep gold and clearly puffed up. Keep an eye on them at the end—they can burn fast. Let them cool a bit before gently twisting off the metal molds.
- Putting It All Together:
- Make sure both horns and custard are completely cool. Put your custard in a piping bag with a star tip. Stick the tip deep into each horn and fill from inside out until cream shows at both ends. Just before serving, dust with powdered sugar—if you do it too early, the sugar will melt into the cream.
I've found adding a bit of fresh lemon zest to the custard makes everything taste brighter and cuts through the richness. My grandma always told me the key to amazing cannoncini was taking your time with the custard—rushing this step ruins the smooth texture that makes these treats so special.
Perfect Pairing Ideas
These fancy pastries taste even better with the right companions. Try serving them with fresh berries mixed with a touch of sugar and lemon for a pop of color and tangy contrast. For special times, add some good chocolate sauce to the plate before placing your pastry. They're fantastic with coffee—an espresso or cappuccino makes for a true Italian café moment. When hosting, arrange them on a tiered stand with fresh flowers and other small sweets to create a wow-worthy dessert display.
Tasty Twists
The basic vanilla filling works as a jumping-off point for lots of fun changes. Try soaking coffee beans in your milk before making the custard for a coffee-flavored treat. Chocolate fans can mix in two spoons of cocoa powder before cooking the custard. For something different, fold in finely chopped pistachios for crunch and nutty flavor. If you like citrus, swap vanilla for orange blossom water and add fresh orange zest. You can even change up the pastry by mixing cinnamon into the sugar coating before rolling.
Keeping Things Fresh
Empty horns stay crisp for up to two days if you keep them in a sealed container at room temp. The custard keeps in the fridge for up to three days if you cover it with plastic wrap touching its surface. For the best results, fill your horns just before serving rather than storing them already filled. If you must store filled cannoncini, keep them in the fridge no longer than four hours, or the shells will get soggy from the filling. Before serving stored filled pastries, let them sit out for 15 minutes and add a fresh dusting of powdered sugar.
I've learned that watching your temperatures is really the secret to great cannoncini. Your pastry needs to stay cold until it hits the oven, while the custard wants slow, gentle heat to get that perfect silky feel. These cream-filled treats show off everything wonderful about baking—simple ingredients turned into something amazing through technique. They might seem tricky at first, but once you master them, you'll feel so proud—especially when you see how happy they make everyone who tries them.
Common Questions About This Recipe
- → Can I prepare the cream earlier?
- Sure, you can whip up the cream a couple of days in advance. Store it in a tight container with plastic wrap touching the top to stop a skin from forming.
- → What can I use if I lack molds?
- No molds? No problem. Wrap some aluminum foil around a wooden spoon’s handle, slide it off carefully, and use that as a DIY mold.
- → Is it ok to freeze them?
- It's best to freeze the unfilled shells. Defrost, crisp them in the oven, and fill freshly. Filled ones can get soggy since the cream doesn’t freeze well.
- → Why didn’t my dough puff up?
- Pastry often fails if it’s too warm. Keep it cold while handling. Pop it back in the fridge for 15-20 minutes if it starts softening up.
- → How long do these stay good?
- Eat them within a day of filling for the best flavor and texture. Leftovers can go in the fridge, but the pastry will soften over time.