
 Save
Save
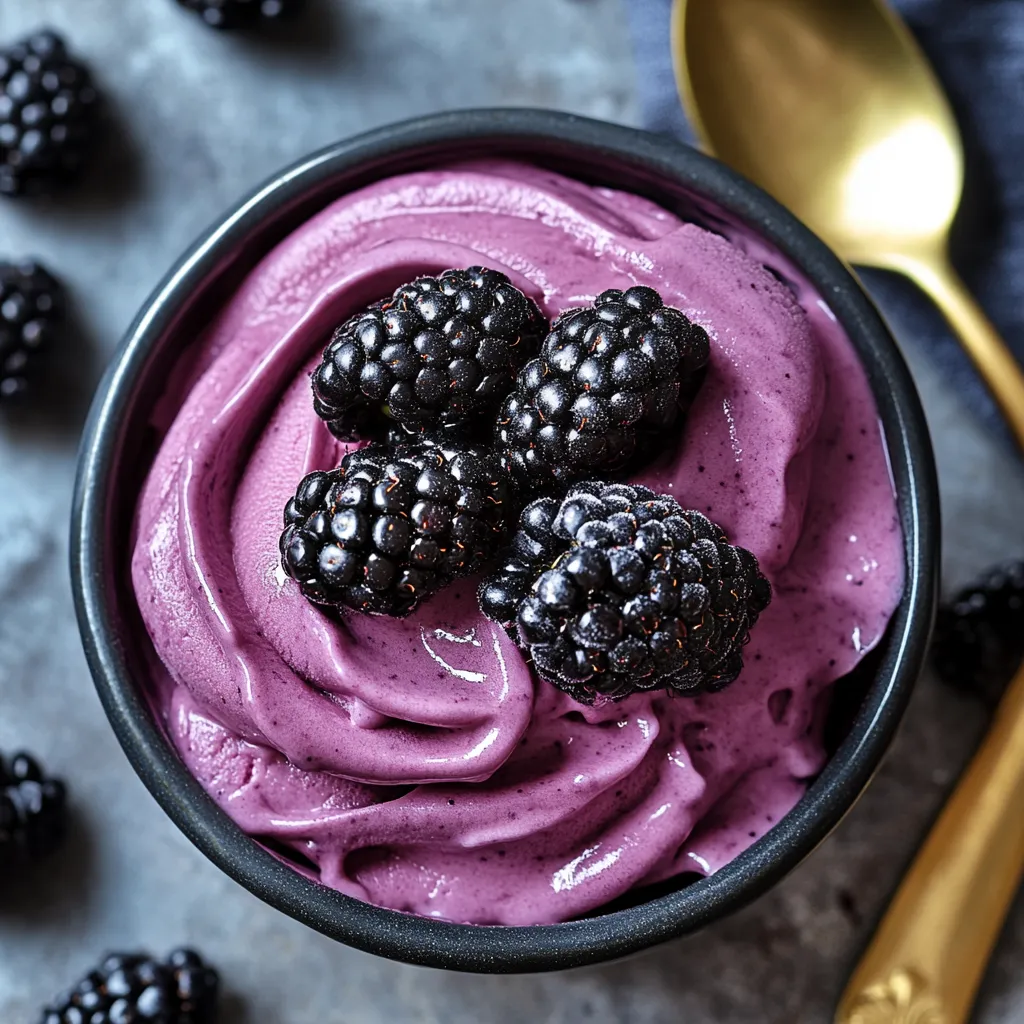
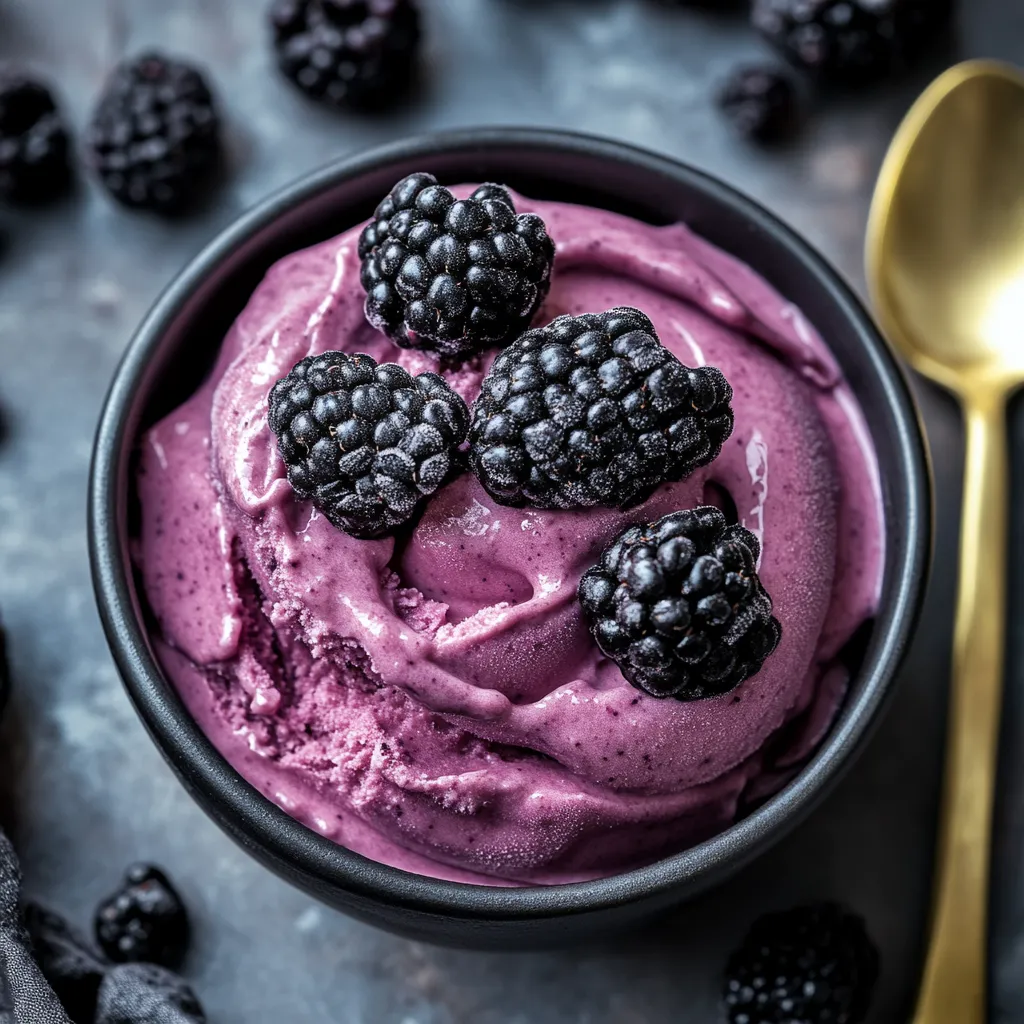
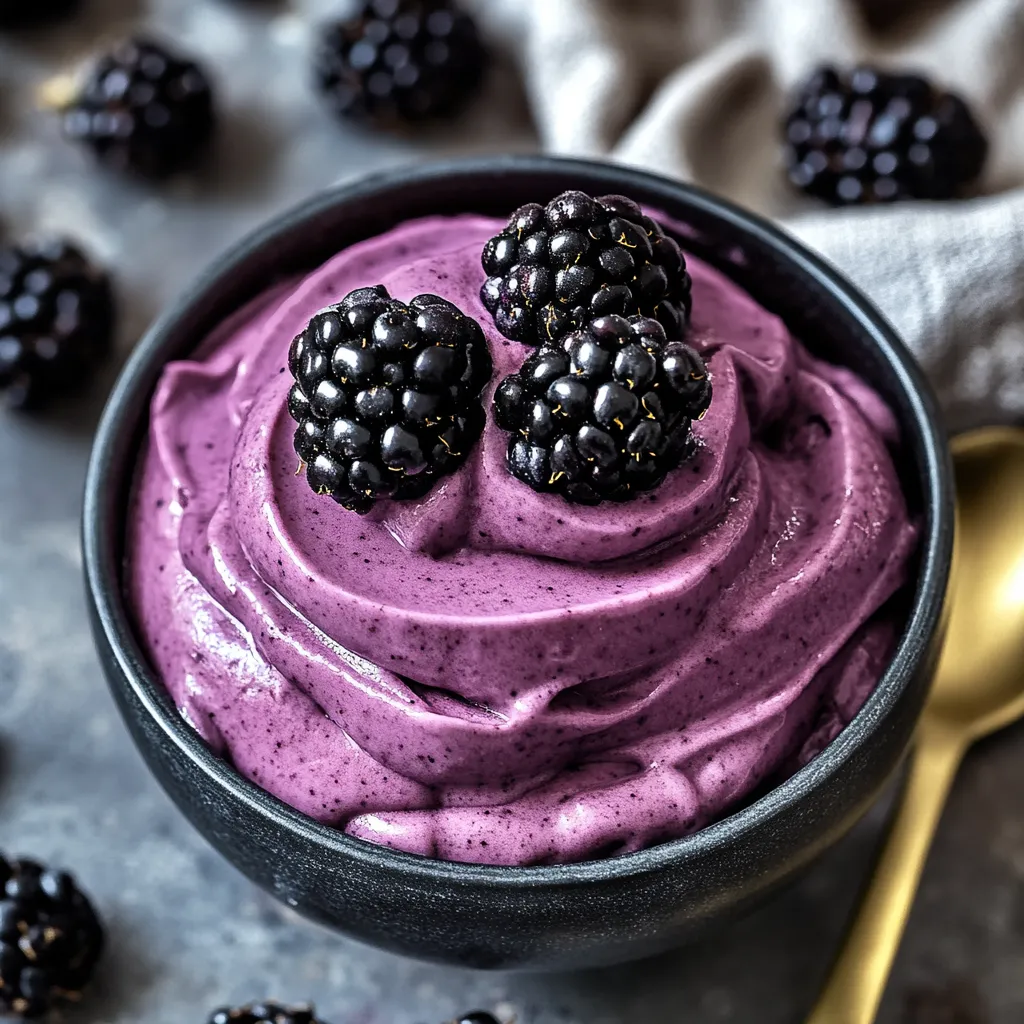
Blackberry Mousse turns juicy berries into a fluffy cloud of deep purple goodness that brings summer's taste in every bite. This fancy treat strikes the right balance between tart berries and sweetness, making a grown-up flavor that's both cool and rich. The smooth-as-silk texture melts right on your tongue, leaving just the bright, strong taste of fresh blackberries. With its eye-catching purple color and super light feel, this mousse wows dinner guests without needing tricky cooking methods or fancy kitchen tools.
I found this treat one summer when my backyard went crazy with blackberries. After trying tons of different desserts, our family fell in love with this mousse because it really shows off the berries' flavor while making them into something special. When I made it for my sister's birthday, her mother-in-law—who usually says no to sweets—asked for the recipe and helped herself to seconds.
Ideal Components
- Fresh blackberries (2 cups, extra for topping): Give that strong berry flavor and gorgeous color
- Granulated sugar (½ cup): Cuts through the sourness without being too sweet
- Lemon juice (1 tablespoon): Makes the berry flavor pop
- Heavy cream (1½ cups, cold): Creates that wonderful, light feel that makes mousse special
- Vanilla extract (1 teaspoon): Adds richness and more flavor layers
- Powdered sugar (2 tablespoons): Makes the whipped cream sweet and helps it stay fluffy
- Fresh mint leaves (optional): Add a nice green touch and fresh smell
Mousse Assembly
- Berry Cooking:
- Mix fresh blackberries, granulated sugar, and lemon juice in a pot over low heat. As they warm up, the berries start to soften, letting out their dark juice. The sugar melts into the mix, making a sweet-smelling, bubbling mix that captures summer's taste. Cook for 5-7 minutes, stirring now and then and lightly squashing berries against the pot to get more flavor out. This cooking makes them sweeter while taming that sour kick blackberries often have.
- Smooth Mix:
- Put the warm berry mix in a blender or use a hand blender until totally smooth. Then comes a key step—push the mix through a fine strainer. This gets rid of all seeds and tough bits, leaving a smooth, strong-flavored mix that'll blend perfectly into the mousse. The bright color gets deeper as it cools, turning into a rich jewel shade that hints at the amazing flavor coming. Let this cool completely to room temp before moving on.
- Whipped Base:
- While your berry mix cools, get the whipped cream ready in a big bowl you've kept in the fridge. Cold tools help make the best whipped cream. Beat the heavy cream until soft peaks start forming, then add vanilla extract and powdered sugar. Keep beating until the cream makes stiff peaks that stay up when you lift the beater. The cream should be firm enough to mix with the berry stuff but still light and fluffy.
- Careful Mixing:
- How you fold everything together really matters for the right mousse texture. Start by mixing about a quarter of the whipped cream right into the blackberry mix, stirring until well combined. This makes the thick berry mix lighter so it's easier to add the rest of the cream without flattening it. Then, carefully fold in the rest of the whipped cream using a big rubber spatula. Cut through the middle, scrape along the bottom, and fold over. Turn the bowl and do it again until the color is even with no white or purple streaks.
- Cooling Time:
- Spoon or pipe the finished mousse into separate serving glasses or pretty bowls, making it look fancy while showing off the beautiful color. Cover each glass with plastic wrap and put in the fridge for at least two hours, four is better. This cooling time lets the flavors mix and the texture set just right—firm enough to hold a spoon mark but still airy and light. The mousse keeps developing better flavor as it chills, making it great to prepare ahead.
- Last Touches:
- Right before serving, top each mousse with fresh blackberries and a tiny mint sprig. This not only makes it look prettier with different colors but also adds fun texture with the juicy pop of fresh berries against the smooth mousse. For special times, think about adding a light dusting of powdered sugar or a small cookie beside each serving for extra crunch and flavor.
My grandma always said blackberries were nature's little treasures, and handling them carefully showed respect for their short summer season. She'd take all us grandkids berry picking, showing us how to pick only the darkest, most fragrant ones. When making desserts with them, she always said the real skill was keeping their true flavor while making them extra special. This mousse follows her thinking—treating simple things with care to make something unforgettable. When I make it now, I'm taken back to her sunny kitchen, where I first learned to love cooking with the seasons.
Beautiful Serving Ideas
Show off this pretty dessert in clear glasses to highlight its deep purple color. For dinner parties, try stemmed dessert cups or champagne glasses for a fancy look. Make a layered treat by putting mousse between thin layers of crushed graham crackers or shortbread for different textures. For a more homey feel, serve in little mason jars topped with some crunchy granola and a honey drizzle. This mousse works great for both casual family dinners and fancy get-togethers.
Fun Twists
Change up this basic recipe by adding white chocolate—melt 4 ounces and mix into the blackberry stuff before cooling for a richer treat. For a grown-up version, pour in 2 tablespoons of Crème de Cassis or Chambord to the blackberry mix. Make a knockout layered dessert by stacking blackberry mousse with vanilla bean mousse in tall glasses. During other times of year, try the same method with different berries—raspberries make a bright red version, while blueberries give a milder, sweeter taste.
Keeping It Fresh
You can make this mousse up to two days before your event, which makes hosting so much easier. Keep it in the fridge, covered with plastic wrap touching the surface so no skin forms on top. For the best look, wait to add toppings until just before you serve it. While freezing isn't the best for texture, you can freeze single portions if needed for up to three weeks. Thaw them overnight in the fridge instead of on the counter for better texture.
I've made loads of desserts in my cooking life, but there's something truly special about this blackberry mousse that I come back to every summer. Maybe it's how it captures the true taste of summer berries in such a fancy way, or how it turns basic ingredients into something that feels really special. What I love most is watching people take their first taste—there's always that look of surprise when they realize how much blackberry flavor comes through in something so light and fluffy. It reminds me that sometimes the simplest dishes, when made with love, create the best food memories.
Common Questions About This Recipe
- → Can frozen berries be used?
- Sure! Just defrost fully and remove any excess liquid first. They might need more simmering to reduce extra water.
- → Why does my mix seem too soft?
- Make sure to whip your cream until it's really firm. Don’t mix the berry puree while it’s warm, as that can mess with the texture.
- → Can other fruits replace blackberries?
- Totally! Try raspberries, strawberries, or a mix. You'll just want to adjust the sugar since some fruits are naturally sweeter.
- → How early can I prep it?
- You can make it up to two days ahead. Keep it covered in the fridge and wait to decorate it until serving.
- → Why can't I get stiff cream peaks?
- Make sure everything’s chilled—cream, bowl, and beaters. Also, medium-high speed works best for stable results.